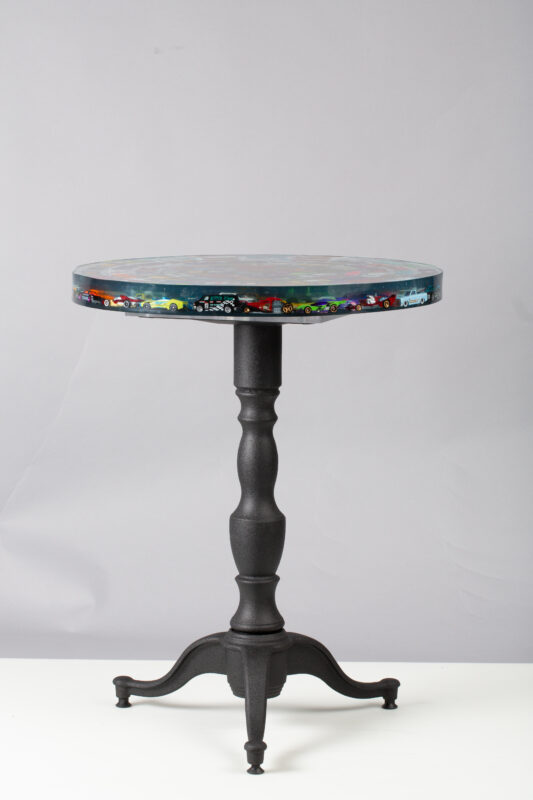
We wanted to show off some of our bases with a fun project. Inspired by an Instagram video, our team decided to make this custom resin table filled with toy cars as a gift for our team member's sons. This was an interesting project for us, we have a lot of expertise when it comes to table bases, table tops and other pieces of furniture. We do not have very much (really any) expertise on working with resin or making fully resin table tops. Armed with just a video (in another language) we decided to try and recreate this table top to pair with one of our excellent bases.
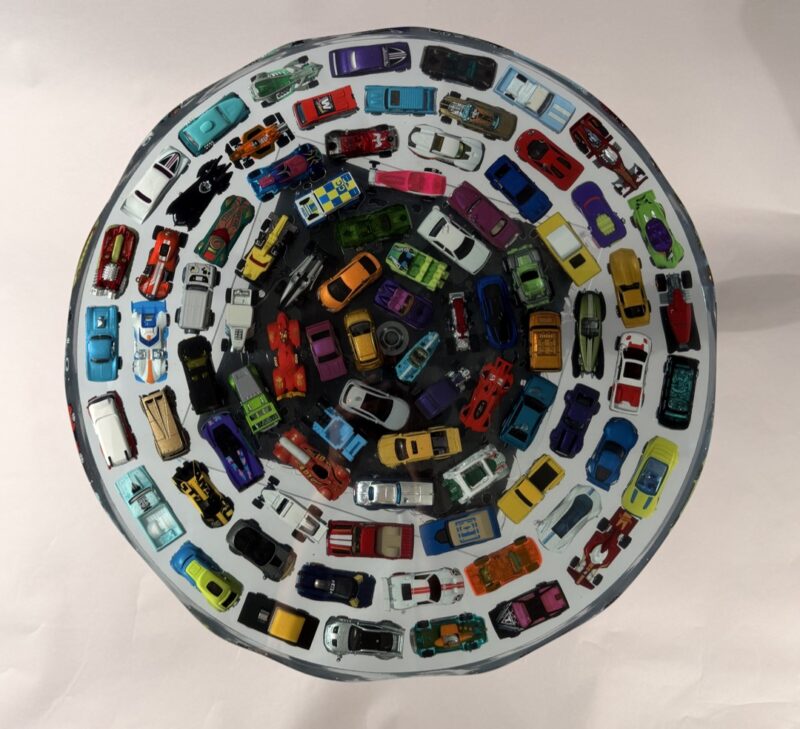
We started in a place that so many kids dream about, the toy aisle. We picked through half a dozen stores, buying as many toy cars as we could without duplicating any models. We ended up with about 100 little toy cars ready to arrange in our 24" round silicone mold.
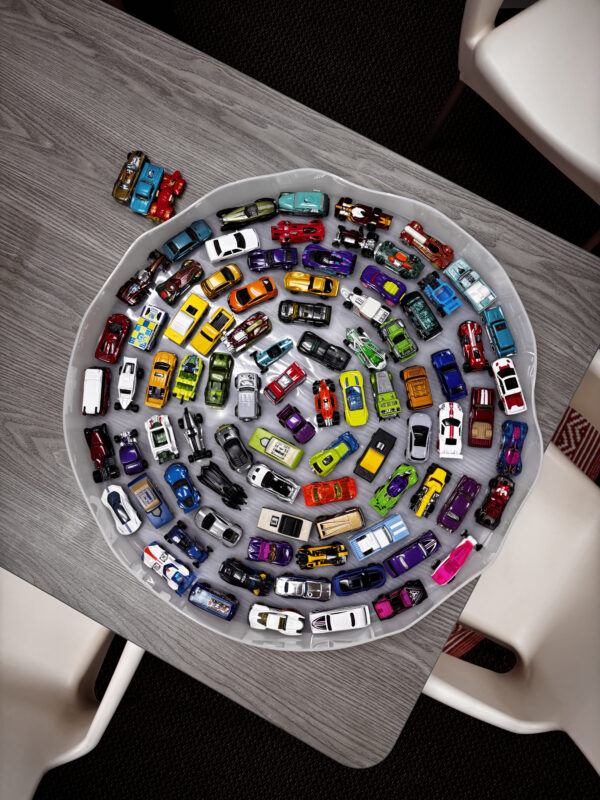
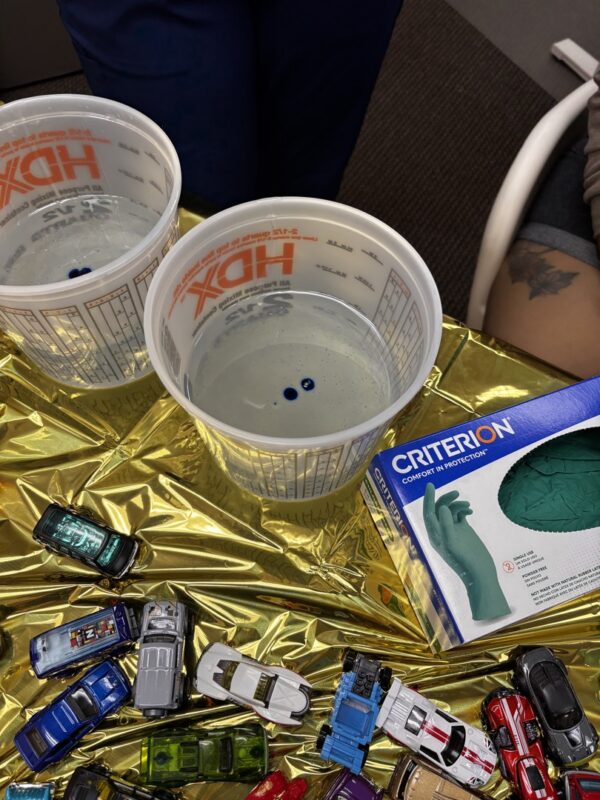
We used a thick pour, two part epoxy resin that is made for doing larger projects. We also decided to add a small amount of blue color to the resin, rather than leave it clear. Resin can yellow over time (especially apparent with clear resins), so we hoped that the blue would offset that yellow aging. We had to pour a thin layer of resin and let it cure in the mold. That way there was a solid platform underneath the cars, which prevented them from sinking down to the bottom (we didn't want any wheels poking through). After that, we poured another thin layer of resin, and before it hardened, we arranged all the cars in the still wet resin (this is the sped up part of our video, it took quite a while to arrange them).
After that, all that was left to do was let the resin cure, pour another layer, and repeat until all of the cars were fully covered. This is where we made a slight error. Thinking that we wanted to save time, we decided the next layer of resin would be extra thick (just over an inch). However, when it's curing and hardening, these epoxy resins release A LOT of heat (we were shocked by how hot it became). The heat deformed the silicone mold at the edges, which made turned it into an imperfect circle. The thick layer also made it hard for bubbles to escape, so when we returned the next day, we had a fully hardened table that was a little wonky and full of bubbles!
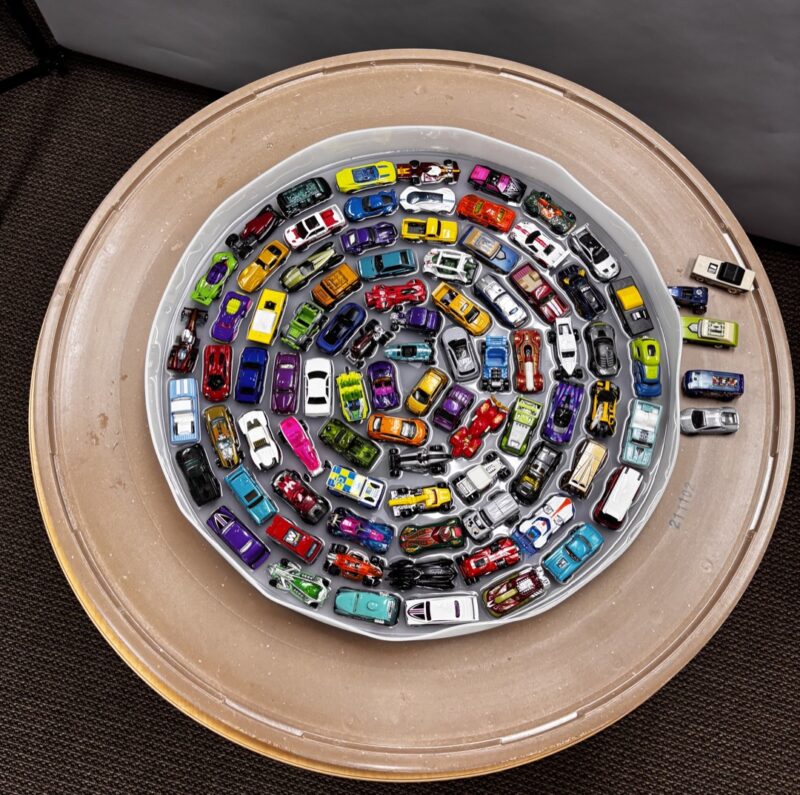
We decided to get creative to address the bubble issue. We grabbed our handy power drill, and using a very small drill bit, we drilled holes down through the resin to access each bubble. Our theory was that during our next pour, the resin would fill into the drilled out holes, and once cured it would all blend together. The process of drilling out the holes was actually quite satisfying and fun! And our theory proved to be partially correct. On our next (and final) pour, most of the bubbles and holes did fill in and became nearly invisible. A few ended up being noticeable, but with the blue color, it just added to the effect of making the entire thing look like a toy car aquarium.
We finished off the table by letting it cure for a week to make sure the whole thing was solid, and then removed it from the silicone mold (which luckily can be reused a few times). We then sanded down the edges with some very fine grit polishing sandpaper to smooth everything out. Finally, to make it so we could mount the table top to a base, we had a custom pieces of clear acrylic cut as a sub-top. This was mistake number 2 after the really thick layer. Not only is acrylic a bit hard to drill into as a sub-top, but it also means that the table base is visible through the table top. Had we thought ahead, a nicely stained piece of wood probably would have been a better option.
That said, we are so happy with how this table turned out, and it was a really fun team building project for our staff. The lucky three year old who is receiving this as a gift is going to be able to keep it for a very long time, although he already asked us if we can "open" it so he can play with the cars.
